Thursday, 15 January 2015

A new Fridge!

The first coolbox I bought was a Waeco Tropicool TC14 -


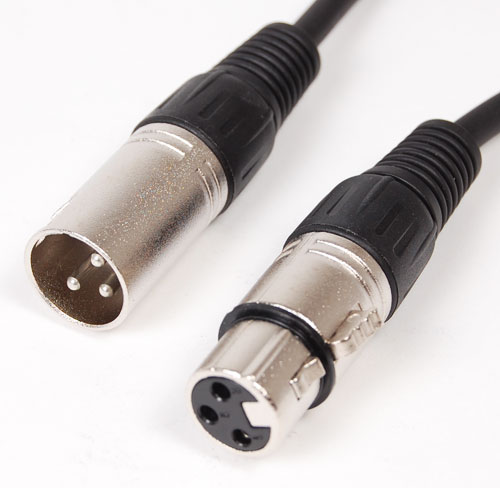
I got it very cheaply on eBay - because it was broken. I don't quite know what happened it, but the seller said that it blew the fuses on his car, and that was it. The supplier did not want it back, so maybe it's a know fault. Opened it up and sure enough a part of the PCB track had vapourised and the top had blown of the 12V regulator. I bridged the track, and bypassed the regulator, since I had a nice 12V supply. Sweet - the lights all came on. After that I replaced a few more transistors and the box was in full working order. Unfortunately there wa no 12V lead, which go for £20+ on eBay, but a bit of hunting around found I found these for less than £4 from Qfonic
 This coolbox is great - it will quite happily cool to 30 deg below ambient and at 14 litres it's big enough to keep 2 or 3 days food fresh. I used a wireless meat thermometer to test out the coolbox, and left it in the box so I could always see what was going on.
However there were some issues. Firstly because the is no aircon in the van - temperatures can easily be 35 deg when parked up for the day. Coupled with the fact that the box was only powered during hookup or when the engine was running, and the setup became marginal. If we were at a site and going out for the day, I could unhook and leave the box behind - again not ideal.

So after our first year out, to simplify things, I decided to get a proper fridge.
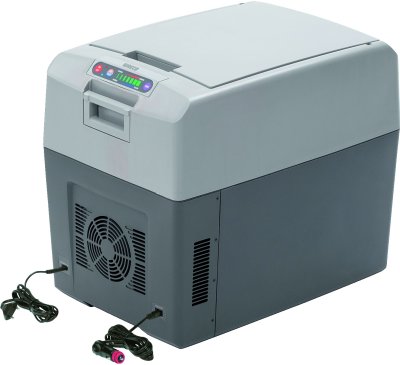
When I was building the cabinets last year I had contemplated getting a proper fridge, but decided it was too expensive and too much work. I was probably right, but at the time I had made sure that the I could fit a fridge if I needed too. Space as usual was tight but I knew that I could fit a compressor fridge Waeco CR40. The main feature is that the bulky compressor bits can unhook and be stored elsewhere.

This is the kitchen area before


The compressor mounted on top of the subwoofer amp, and hooked on to the rear partition.
The partition also has a hole cutout for ventilation. The flexible pipe felt really fragile but it can be  cooiled quite tightly if you take your time.


Everything but the floor had to dismantled.


Fridge finally in position


These fridges are very expensive due to the cost of the 12V compressor & electronics, but the upshot is that the power consumption should be a lot less than the peltier type coolboxes.
Initial tests (in the UK winter) show a typical draw of 3A - I'm hoping that this will equate to about  an amp an hour in normal use. However, now that intend to run the fridge when away from hookup, it means that I'll need a second battery, which then lead on to getting a solar panel & controller. More expense.


Monday, 28 April 2014

Suspension

After going out on a trial for a dew days, it became apparent that when the van was fully loaded, it was really low to the ground. The exhaust was worry as the rear box was diverted to the side and looked very vunerable. However the biggest problem was that the pipework guarding the fuel tank  was scraping going over speedbumps.
OK new springs then? The issue I had was that I had no idea what springs had been fitted. More than likely the wheelchair conversion co swapped them out for softer springs - but I had no way of telling.
Also I have a healthy aversion to spring compressors.
I did look at spring assistors, which are rubber inserts that effectively shorten the spring. This does not sem like a good ideal, since you are simply putting more stress on the rest of the spring. Tempting fate I thought.

Then I found MAD Helper springs. According to the blurb "..are progressively wound steel coil springs fitted in conjunction with the original suspension. MAD Progressive Springs have little or no effect while the vehicle is unladen. As the load imposed on the suspension increases, the springs quickly become stiffer, reducing the amount of “sag,” improving the ride height"

 This seemed a perfect solution - they were definitely going to stiffen things up and I didn't need any special equipment to fit them. The only problem I had fitting them was that there was not enough room under the suspension to slide the spring up inside the existing spring. So I moved the van over a manhole and slipped the spring inside.
The end result was an extra 5cm ride height - not much but enough to make a difference.


Wednesday, 19 February 2014

Mains Electrics

Most motorhomes will use a garage type combined MCB RCB unit, which is rather bulky.
I decided that a fused RCB spur, Timeguard RCD Spurt TFP10WL would do exactly the same job.
They are rate at a maximum of 13A - which is lower than the usual 16A, however the likelyhood of ever being able to use 16A is remote. The trip current is 30mA.
In addition I bought a plugin mains tester from Aldi, and wired it permanently sio that I can see if the incoming supply is live, and if there is something wrong with the wiring.


Electric connector fitted


Plastic conduit to carry the 2.5mm heat resistant cable


Cable entry into main units

Personally I'm not entirely happy with connecting the body of van to someone else's installation.  There are pros and cons, but that's what I've done.
 

Thursday, 13 February 2014

Plumbing

Update 15th May 2016

Well the Whale GP1002 pump lasted 2 years, until it blew the fuse and refused to start again. These are sealed units, so I had no choice but to buy a new one. When
I smashed the old one up, and I could see that water had been leaking into the motor wired connections - in fact the wires were corroded right to the other end of the cable. It was probably due to the crack that I had caused and repaired when installing - must have been a hairline crack in the casing as well.
Anyway it was an opportunity to review the superseal connectors.


The reason for using these was because I wanted the ability to move the water container outside, which in turn would release some more room, to allow the passenger seat to rotate. In reality, we did not really need to turn both seats, so the water container stayed indoors. They are good connectors, but not really designed for easy connect/disconnect.
Since I use XLR for 12V elsewhere in the van, I chose the locking mini XLR for the job. It was a bit of a squeeze to get the cable into the strain relief, but the overall result feels more robust.


- end
 
 Plumbing

We have previously owned a folding camper, which had a whale watermaster connect like this

It was horrible to use. The connector was difficult to attach and detach without scraping you knuckles, and the electrical connection was somewhat unreliable.
To make the connections as simple as possible, I permanently keep the pump in the water container, and use standard garden 15mm quick connect fittings. For the 12v supply I use Superseal waterproof  connectors.


Note the male 15mm connector - these are not standard, but are used in irrigation systems. Search for Antelco Snap On Joiner x 13mm Barb


Water inlet and waste - inside


My plan was to be able to store the water inside or outside the van when parked up.  So there is a water inlet connector under the van, beside the waste outlet

Water tank in position. In practice since we don't turn the passenger seat, the water tank usually stays inside.
 

Saturday, 1 February 2014

Kitchen

The worktop, is made from Bushboard splashback (£20 on eBay) - which is also used for the sliding table. Since the splashback is only 9mm, some 6mm ply is glued to the back to be able to use the knock in trim. The slot for the trim had to be made oversize so that the trim could be glued in rather than knocked in. I can see some scratches already, so I'm not sure that the right choice was made here - but it's done. The microswitch tap is DLT540C and the sink is a Smev 930 both from Caktanks.


Worktop fitted


The usual choice for mains sockets and switches for motorhomes, is Italian firm CBE. After spending a few days looking at the options (surround, mounting plates, backbox), I just ended up with a headache. There were some many bits and pieces need to configure, that the costs really start to mount. Maybe its not so expensive for the professional fitters. Anyway I chose some very nice black flush fitting screwless switches and sockets from Seeswitches. These are full size but I think that the flush fit makes them look the the part, and they you can use the standard backbox.


Since the van is small, I was not comfortable using gas to cook with, and since we mainly intended to stay in camp sites, I decided to use electric as the main cooking source. So I bought Tefal toaster oven on eBay and an induction hob from Aldi.
This can be adjusted for power in 10 steps from marked 200 to 2000W
The power settings  work at three levels 1200W, 1400W, and 1800W. Below the 800W setting the unit cycles on and off every few seconds, using 1200W pulses, above this it the cycles are much shorter.


The table stows in the underfloor area that was originally part of the wheelchair ramp.
Table erected


When the front seats are rotated, there's plenty of room for 2 people. I practice we only ever turn the drives seat.


 Waeco coolbox and Tefal toaster oven


Saturday, 11 January 2014

Upholstery

The design of the bed frame meant that the upholstery could only be 75mm thick, which is probably fairly standard for this type of installation.
Since the bed is also used for sitting on as well as sleeping then some compromise need to be worked out.
For the seat I settled on 75mm V38 grade firm foam, and for the remaining bedding area 50mm medium firm Vita Reflex 40H with 3cm 50kg/m memory foam on top. The foam was glued with Stikatak onto a 9mm ply, and covered with 6oz Dacron. The Dacron gives a softer feel , rounded edges and will wick liquid away from surface spills.


I really did not want to use pvc leather for the seats, since we would be sleeping on it also.
I like the idea of Novsuede, which is a faux suede that is water resistant, beatable and hard wearing. The only downside is it is very expensive, maybe £50 a metre. However if you are not hung up on the exact colour you want there are plenty of people sellin remenants. I got mine from endoflinefabrics.co.uk for £15 per metre.


Upholstered seat


From the rear, showing bedding storage area


Bed folded out


To finish the bed off, we use a mattress protector and custom fitted sheet.


Friday, 10 January 2014

Bed Frame

I probably left it too long to sort out the bed. Really the bed should be the first thing to decide on, because everything else has to fit around it.
The problem I had was that the standard width for a 3/4 size rock and roll frame seems to be 120cm. For me this was too wide, if I ever wanted to fit a compressor fridge. But I eventually found a bed on eBay that was 104cm - perfect.  I chose the model, where there was some space at the back when the bed was folded, which would allow us to store the bedding.


The only problem was that I had decided that I wanted to put the kitchen and units behind the passenger seat -m which is not the norm. So this meant that the clearance over the wheelarch needed to be on the other side. A quick message to the seller at http://www.rjscampervans.com and since they would make the frame to order it was no problem to modify.
Less than a week later, for £200, I had my frame all the way from cornwall.
This is a very simple design, which needed a couple of small modifcations.
Firstly pulling the bed out and pushing it back in, was difficult - partly due to the weight, but mainly because the front runners have to slide along the floor. To ease this I fitted castor wheels to the back of the runners, so when the front it tipped up slightly the wheels hit the ground. Without this mod, the bed would be barely usable.


When closed the front of the bed is retained with some welded stops. These tended make the open/close operation more difficult, and so I removed the stops. In practice the front runners by themselves are enough to keep the bed in place when driving.

The bed was secured with 4 bolts through the floor on one side and 4 screws into the floor on the other.